The wizards for starting the inventory process can be accessed from the Inventory ribbon. Learn how to use the wizards for the inventory process by reading the Inventory chapter.
Inventory
To launch the Inventory wizard, click the Network Scan button.
The Initial Scan collects basic information about the network such as Active Directory, Windows Systems, DHCP, DNS, Exchange, and SNMP using a wizard.
Depending on the type of system you want to scan, click the associated button.
In addition, you can use the Script Import button to import script files. The button Docusnap Tools opens the folder which contains the executable file for creating the script files. More information about Docusnap scripts can be found in the Scripts chapter.
When you click the ADS Synchronization button, the scanned systems are compared with the systems known to the Active Directory system. Then, the computers that are no longer found in the Active Directory system, but still exist in Docusnap, will be displayed. From that dialog, you can determine whether these computers should be deleted from the Docusnap database as well. The Active Directory system will not be modified by Docusnap.

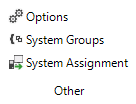
Other
Settings for the number of archived versions and the execution of the wizard for the inventory can be made in the Options dialog.
In the System Groups dialog systems that have been scanned can be assigned to system groups to define logical groupings. For each group, specific maps can be generated.
In the System Assignment dialog, systems can be assigned to the sites.