The Diagrams ribbon is displayed when you select the headline Diagrams in the Documentation tree. Using this ribbon, you can save and edit diagrams.
General
Click the Export button to export the current diagram into different file formats (vdx, png, html, svg). Clicking the Reset button will reload the last saved version of the diagram.
Arrange
The Arrange group on the ribbon is used to select the algorithm for the automatic arrangement of the objects.
If the Connect automatically button has been enabled, a new component will always be connected with the most recently selected component.
Adjust
- The Pointer Tool allows you to select individual components by a mouse click.
- Click the Move button to enable moving of the entire diagram.
- If the Connector tool has been selected, you can create a relation connector by clicking a component while holding down the mouse button. That component can then be dragged to another component and, by doing so, the two components will be connected.
- Clicking the Fit to Page button adjusts the diagram to the page.
- Show Grid: In the background of the drawing sheet, a grid can be displayed that helps you align the components.
- Fields: Each relation has properties, such as a name, description, priority, etc. The fields to be displayed can be selected from the Display Fields for Relations dialog.

Connector
In the Connector group, you can select the connector type and design.
Analyse
- Ancestor: Click the Ancestor button to add the parent node in the tree hierarchy for the selected object.
- Descendant: Click the Descendant button to display all descendants of the selected object and add the desired object.
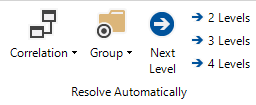
Resolve Automatically
- Correlation: By clicking on the Correlation button all existing correlations for the selected object are displayed. Subsequently, the desired correlation is selected and all objects of the corresponding IT Correlation are added.
- Group: By clicking on the Group button all existing IT Correlations groups for the selected object are displayed. Subsequently, the desired group is selected and the group with all objects of the corresponding IT Correlation are added.
- Levels: Click on the buttons Level to select how many levels of IT Correlations should be resolved.